How To Install Rolled Roofing With Nails
How To Install Roll Roofing A Path Appears

How To Install Roll Roofing Do It Yourself Pj Fitzpatrick
How To Install Roll Roofing Lovetoknow
Asphalt Sbs Roll Roofing Installation Details How To Install Roll Roofing

How To Install A Rolled Roof Ryanhomedesign Co

How To Apply Roll Roofing Diy In A Hour
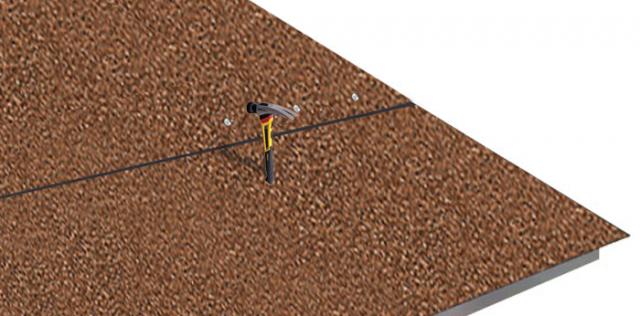
Nail it in place with roofing nails that penetrate at least 3 4 inch into.
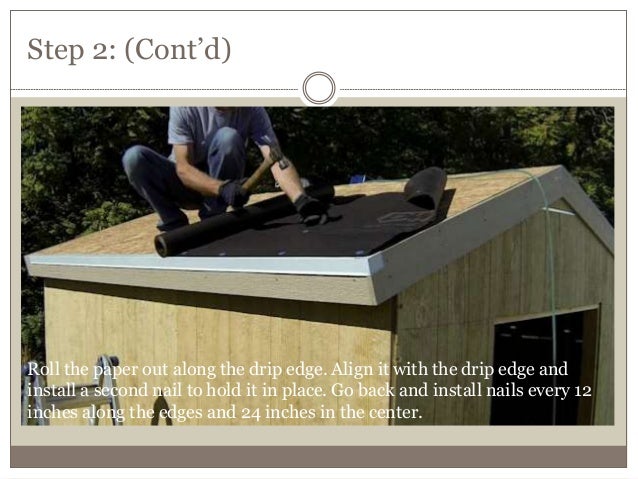
How to install rolled roofing with nails. The base layer will need to be attached with nails to assure longevity of your roll roofing system. Step 6nail the first course match the overhang to the overhang of the starter strip 1 4 to 3 8 from the drip edge. How to nail down roll roofing step 1. Add a second piece of full width roll roofing over the first.
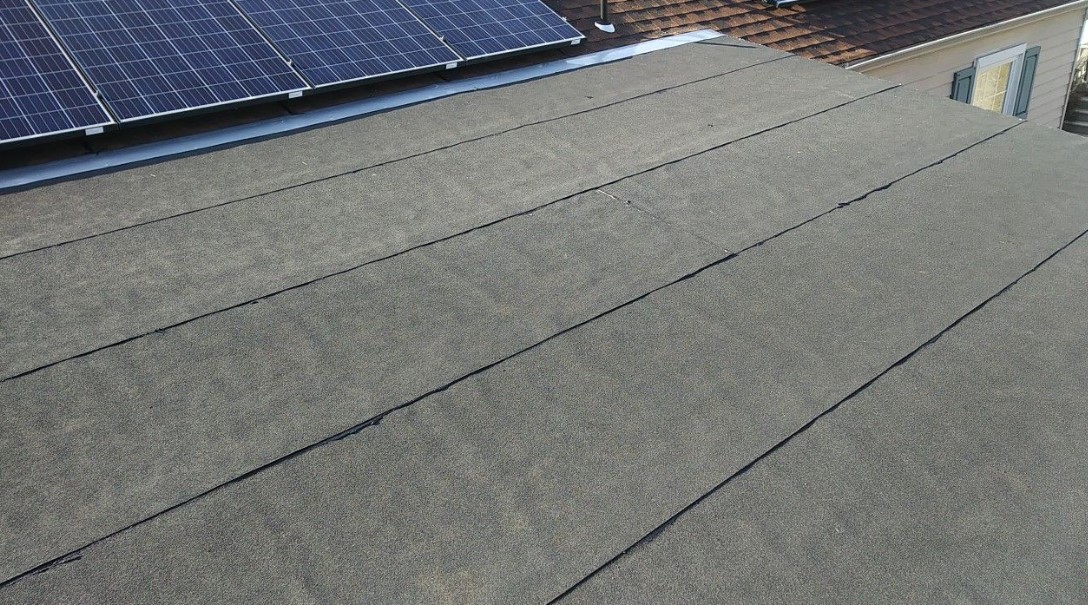
As you work your way up. If you have a sloped roof cut strips of roofing 9 inches wide position them flush with the drip edges along the eave and rake and attach them by driving two rows of nails that are about 3 inches apart. Make sure the rolled roofing is parallel to the eve of the roof. Lay the felt over your roof and attach it with cap nails.
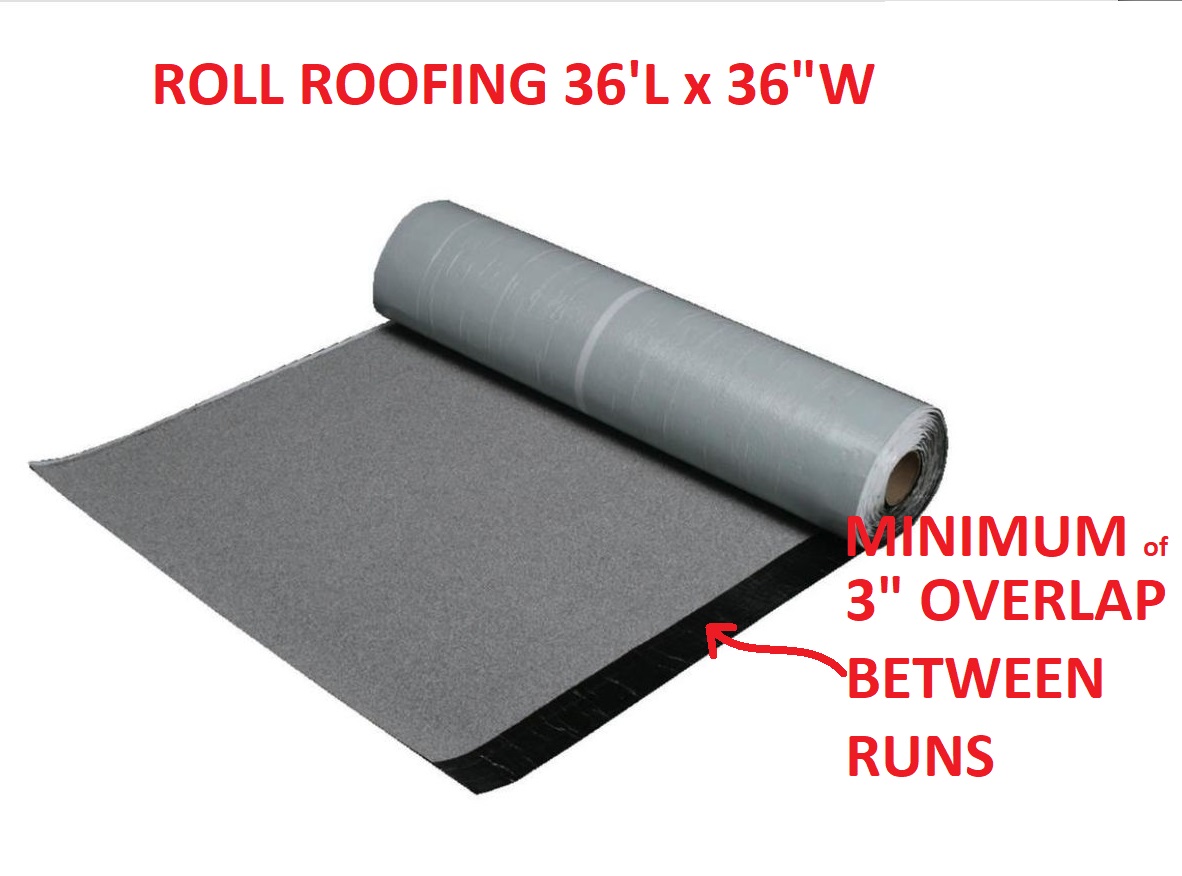
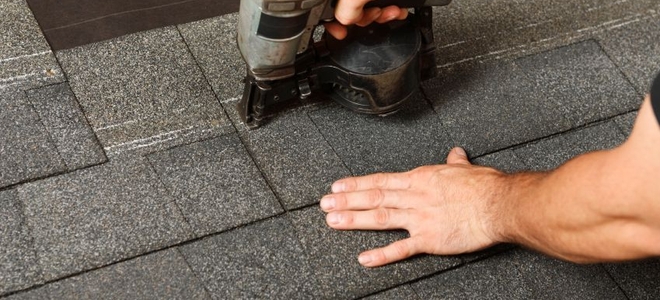
Use a trowel to spread roofing cement over half or more of the strips. Step 4 set the first layer. Make sure the roofing material is laying flat with no bumps or wrinkles attach the upper edge with the large head. The nails should be inserted every 6 inches across the felt.
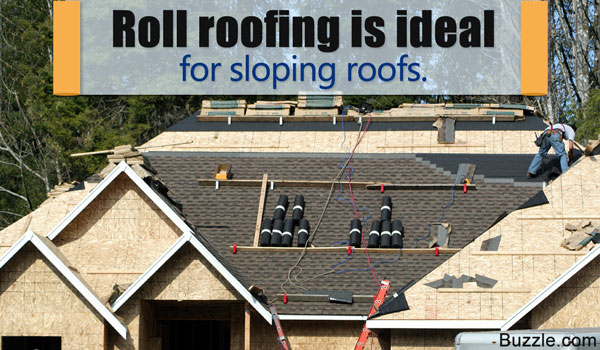
For hips and. The key to a tight roof is applying the roofing when it is warm enough for. Install each course of roofing like the concealed nail method. How to apply roll roofing installation using the concealed nail method.
Make sure that the roof is completely clean. Cover the valley of the roof. The nails should start. The valley of the roof is the point on the roof where the two sides meet.
Prepare a valley between joined roofs by cutting a strip that is 18 inches wide and covers the entire length of the valley.

How To Install Rolled Roofing 4 Easy Steps Ezpzroofing Com

How To Install Roll Roofing With Your Own Hands Roll Roofing Shed Roof Felt Shed Roof

How To Install Roll Roofing With Your Own Hands Roll Roofing Flat Roof Repair Roofing

Install Roll Roofing With No Nails Doityourself Com

How To Install Roll Roofing With Your Own Hands Roll Roofing Flat Roof Fibreglass Roof
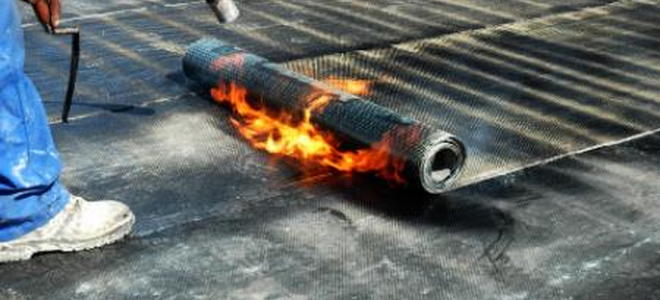
Roll Roofing Installation Asphalt Sbs Roofing Products Defects Repairs

Rolled Roofing Roof Replacement Infinite Roofing Ny

Asphalt Roll Roofing For Sale Bob Doyle Home Inspiration Exclusive Ideas Rolled Roofing Menards

Researchroofing Rolled Roofing Install Professionals Only I Think Not
9 How To Install Asphalt Roofing On A Shed

Weathermaster Tu Ultra Se Atlas Roofing
How To Install Roll Roofing

What Is Asphalt Roll Roofing Smartroof

How To Shingle A Shed With 3 Tab And Architectural Shingles Shed Roof Replace Roof Shingles Installing Roof Shingles
Http Www Quacent Com Q Images Stories Media Doc Installing 20roll 20roofing Pdf

How To Install Rolled Roofing On My Garden Shed Build Youtube

Newly Installed Asphalt Rolled Roofing For A Customer In Kettering Matched The Shingles Perfectly Dependabilityfirst Dcand Roll Roofing Roofing Shack Ideas

How To Glue Down Edge Roll Roofing Home Guides Sf Gate
Https Encrypted Tbn0 Gstatic Com Images Q Tbn 3aand9gcqjkko8nkm53uda0tqsqokgeiud1jh De9ily1gzmetu66zan7e Usqp Cau
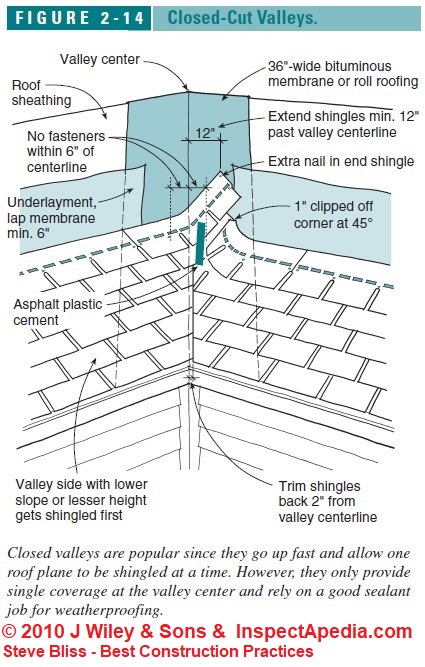
Roof Valley Flashing Specifications And Details

How To Install Roll Shingle Roofing Modelings Co
Asphalt Roll Roofing Vs Asphalt Shingles Doityourself Com

Article About Installing Ridge Cap Shingles And Special Top Row Shingle Layout Details Ridge Cap Roof Problems Roofing

Pattern Of Roof Shingles During Installation Roof Shingles Asphalt Roof Architectural Shingles Roof

How To Build A Tiny House Part 9 Choosing And Installing Roofing Materials Grit

Details That Matter On Asphalt Shingle Roofs Roof Installation Roof Shingles Fibreglass Roof

How To Install A Granulated Rolled Roofing Woodworking Projects Plans Roll Roofing Roofing

Gcp Applied Technologies Tri Flex Xt 48 In X 250 Ft Black Synthetic Roll Roofing Underlayment 5008087 1000 Sq Ft Roof Covering Metal Roof Panels
Inspired Remodeling Tile Sullivan Terre Haute Indiana Surrounding Areas Peter Bales Bathroom Remodeling Tile Shower Installation Contractor Asphalt Roll Roofing For Your Flat Roof

How To Shingle A Roof Diy Roofing Roofing Diy Roofing

Gaf Mineral Guard
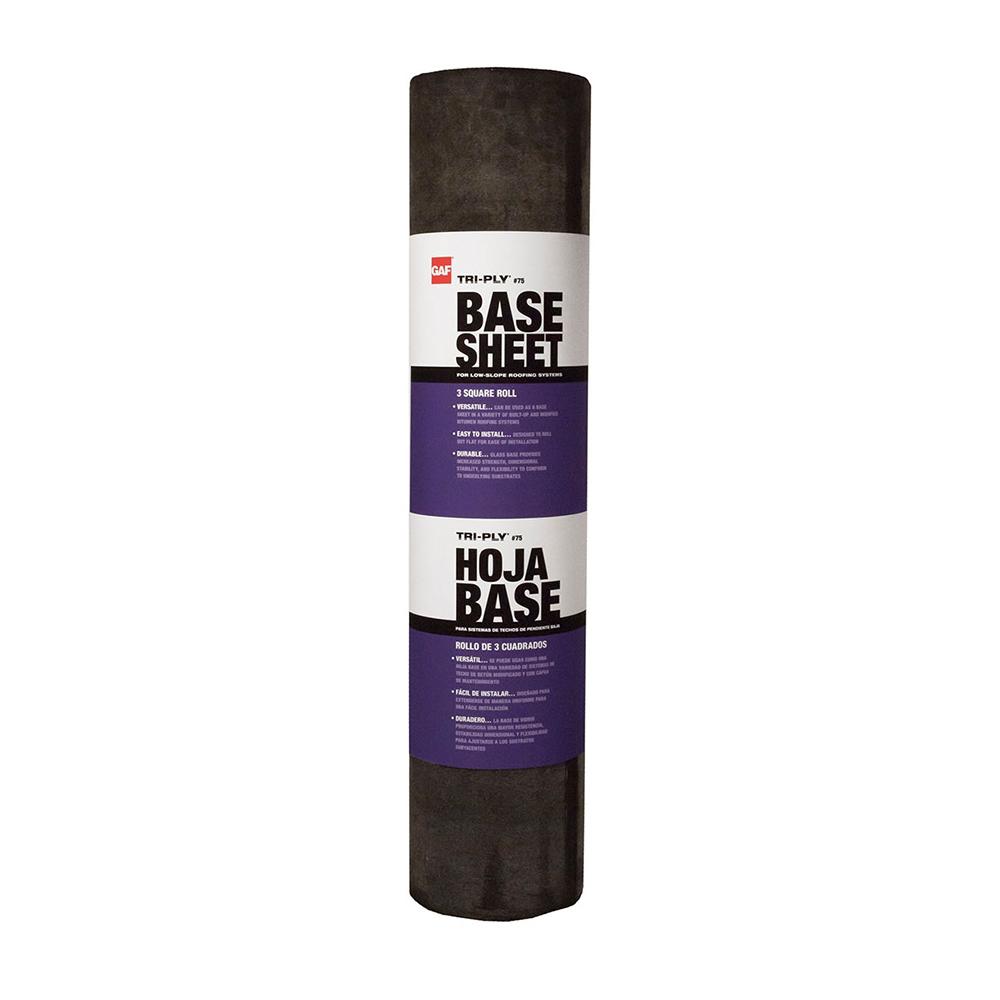
Gaf Tri Ply 75 Base Sheet 3 Ft X 98 Ft 300 Sq Ft Net Membrane Roll For Low Slope Roofs 3389000 The Home Depot

How To Install Roll Roofing With Images Roll Roofing Diy Roofing Installing Roll Roofing

Fiberglass Mineral Surface Roll Roofing
How To Lay Asphalt Roll Roofing Doityourself Com

Roofing System Identify Major Deficiencies In The Condition Of The Roofing System What We Observe Roof Coverings Roof D Vinyl Gutter Shingling Drip Edge

Pin On Highland Homes Roofing

Diy Roof Shingling Installing Roof Shingles Roof Shingles Roof

How To Install Asphalt Shingles Nailing On Ridge Cap Building A Shed Shed Installing Roof Shingles

How To Roofing Capping And Installing Ridge Vent Youtube

Gcp Applied Technologies 36 In X 75 Ft 225 Sq Ft Ice And Water Shield Roll Roofing Underlayment In Black 5003002 Roll Roofing Underlayment Roofing Nails

Reflective White Self Adhered Rolled Roofing 36 X 33 3 100 Sq Ft At Menards

