How To Install Vent Pipe Flashing On Flat Existing Roof

How To Install Vent Pipe Flashing On An Existing Roof Tools Materials

New Vent Flashing On Existing Mineral Rolled Roof Roofing Siding Diy Home Improvement Diychatroom

Pin On Outside

How To Install An Epdm Pipe Boot On A Rubber Roof From Rubber4roofs Youtube

Pin On Roof

Plumbing Vent Boot On Roof Shingles Plumbing Vent Asphalt Roof Shingles Modern Roofing

Put one nail in the bottom edge with a dab of caulk under it to seal the.
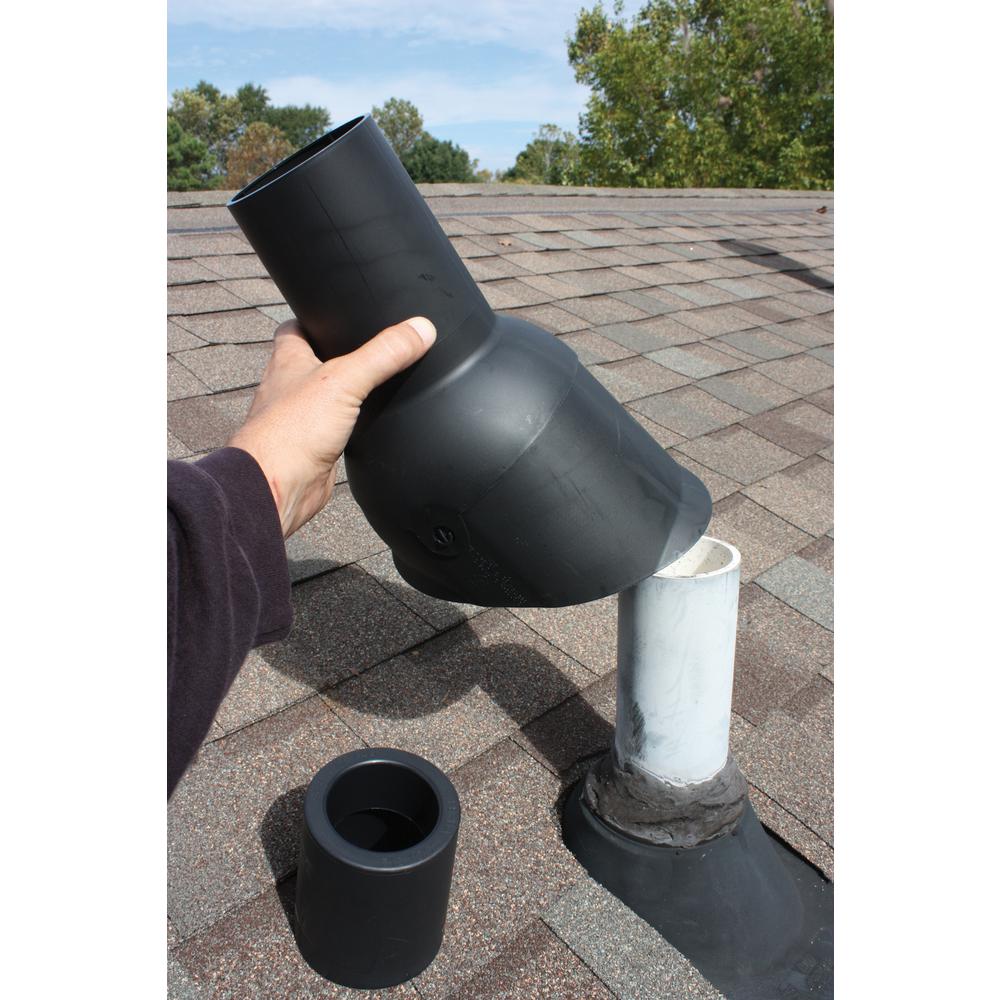
How to install vent pipe flashing on flat existing roof. Hammer the nails into the top and sides of the flashing. Use one roofing nail in each corner of the flashing to secure it to the roof. I ve used this repair on several roofs over the years. In simplest terms a new vent pipe boot flashing is slid over the top of the existing one and the top edge of the pan is lapped beneath the overlying shingle course.
Finally reattach all shingles removed in the process. This great video presentation shows you how to seal a pipe on a flat roof to avoid water ingress and completely waterproof a flat roofing installation. Roofing nails per side photo 2. Slide the new flashing over the vent pipe and under the shingles above the pipe.
Rubber vent flashing automatically adjusts to any pitch lift the vent enough to spread caulk under the sides but not the bottom edge then nail with three 1 1 4 in. Now that the old flashing is gone you can slide the new flashing over the pipe vent and maneuver it under the shingles above the pipe. Center the pipe in the flashing and push the flexible front corners up or down so that the flashing pipe is parallel to the vent pipe. To make the installation easier you can turn the flashing as you lower it in place.
The flashing should be installed under the top and side shingles but it should be laid above the shingles that are below the vent pipe. Add a large bead of caulk in a half moon shape around the flashing and put the shingles back in place. Install flashing on existing roof to extend the lifespan of your roof.

How To Fit A Vent Pipe Detail On A Flat Roof Rubber Roofing Made Easy Youtube

How To Install A Roof Vent Flashing For A Furnace Chimney Youtube

Guide On How To Repair Your Roof Home Improvement Projects Home Improvement Plumbing Vent

Pin On Front Porch

How To Install Roll Roofing With Your Own Hands Roll Roofing Flat Roof Fibreglass Roof

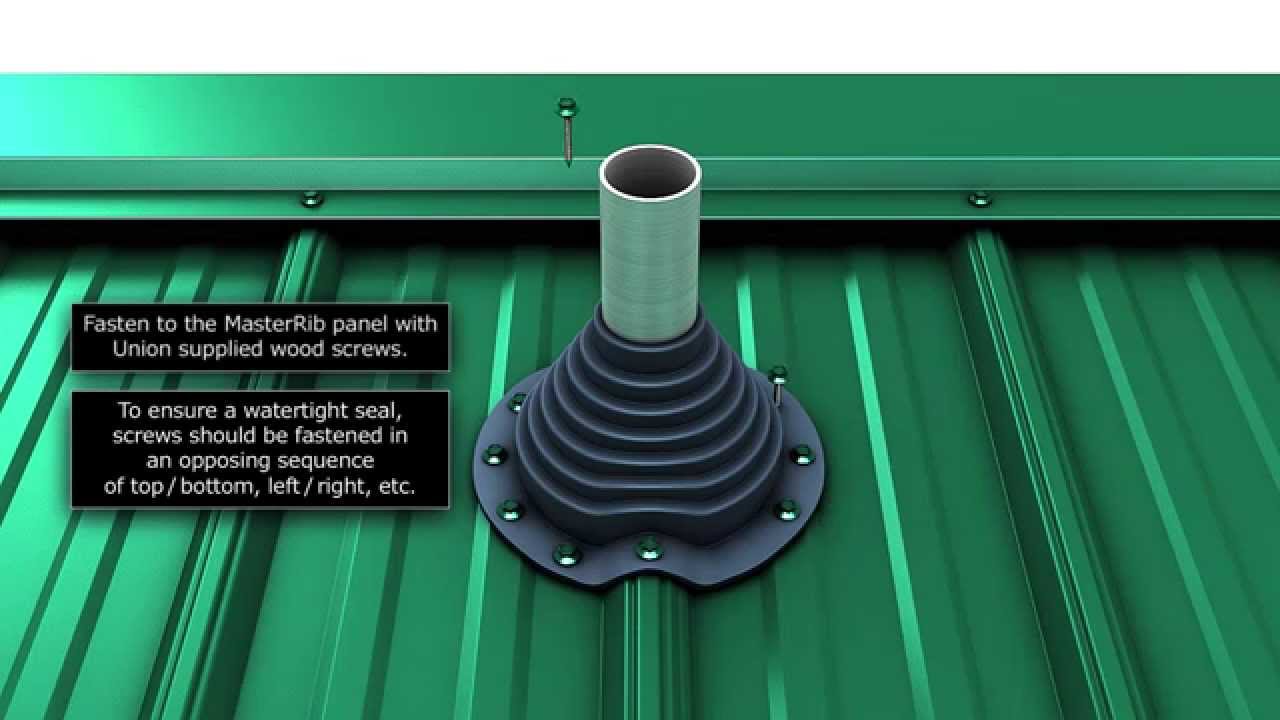
Metal Roof Vent Sealer Adapter Master Flash For Installing Turbines On Metal Roofs Metal Roof Vents Metal Roof Roof Vents
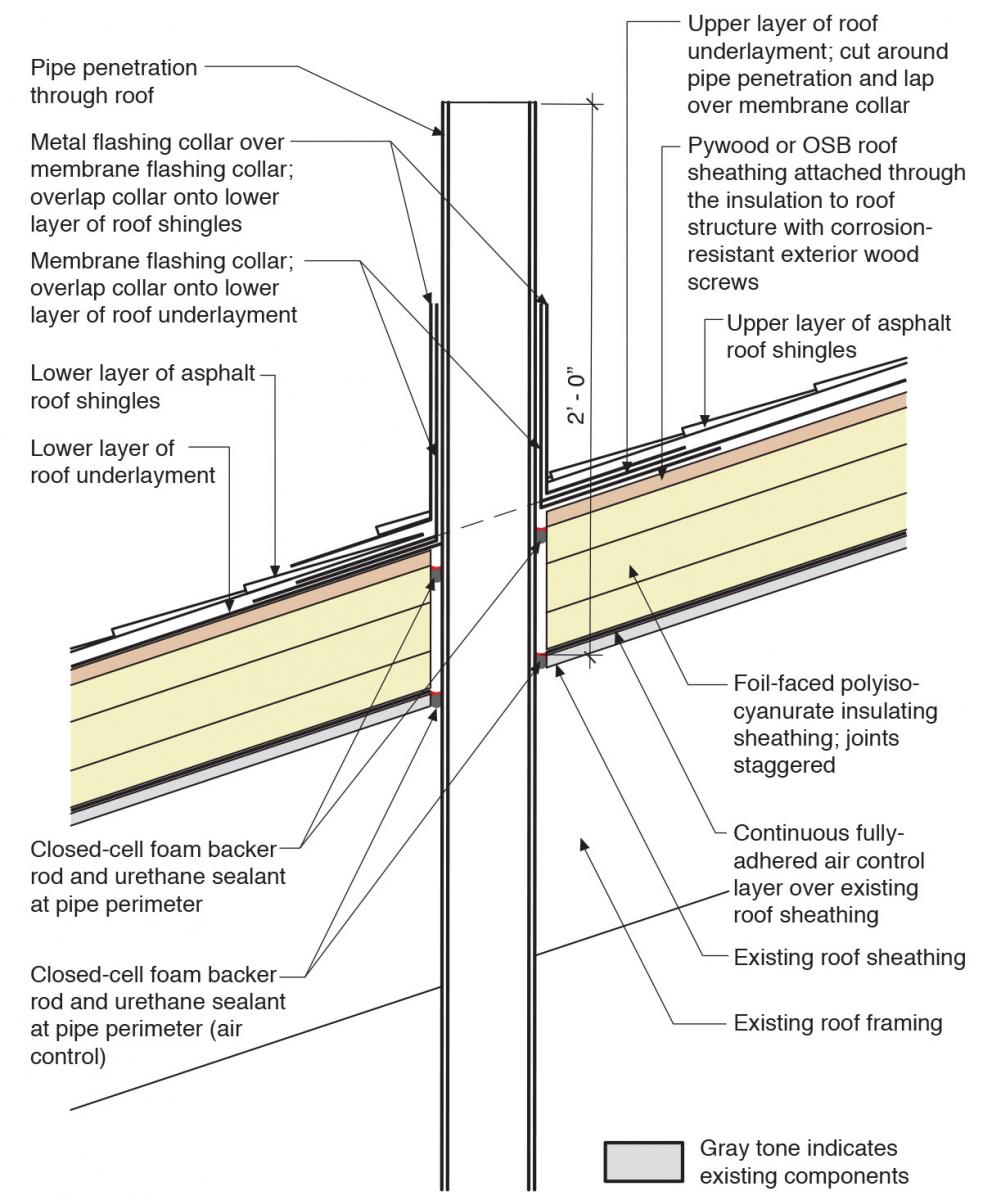
Flashing Of Penetrations In Existing Roofs Building America Solution Center

Pin On Metal Roof

Installing Vent In Flat Roof Roofing Siding Diy Home Improvement Diychatroom
How To Install A Metal Roof Pipe Boot Youtube

How To Install A Pipe Boot On Your Roof Youtube

Pin On Wood Stove Fireplace

Rapid Materials Hering Ideen Designer

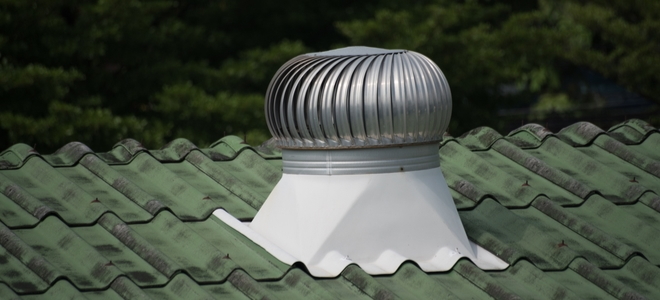
Rotating Roof Vent Vs Ridge Vent Which Is Best The Money Pit Roof Vents Ridge Vent Attic Ventilation

Pin On Stove

Gutter Dimensional Roof Shingles Roofing Accessories Tile Modified Bitumen Contractor Talk Firestone Metal Systems C Roof Installation Roof Drip Edge Shingling
Perma Boot Pipe Boot Repair For 2 In I D Vent Pipe Black Color Pbr 312 2bk The Home Depot

Roof Doctor Inc Roof Anatomy Lingo Raytown Mo Roofing Roof Repair Roofing Systems
Https Encrypted Tbn0 Gstatic Com Images Q Tbn 3aand9gcrzp0uymmygq74nwl5iad9kt X1ji2xmtcsdwo3jcvw5ldiea2i Usqp Cau

Roof Removal How To Tear Off Roof Shingles Roof Repair Roof Shingles Roof Cost

Quickseam Pipe Flashing Boot Youtube

Flat Roof Drains Kessel Leading In Drainage Roof Drain Flat Roof Flat Roof Repair

Duravent Chimney Pipe How To Install A Duravent Chimney Roof Flashing Youtube

Image Result For Joining A Flat Roof To A Pitched Roof Flat Roof Roof Shingles Roofing

Simple System Existing Slope Sheet Metal Coping Sketch Drawing The Image Shows A Sketch Of Metal Coping Ins Roof Architecture Roof Edge House Extension Design

Installing Ridge Cap Shingles At Ends Of Roof Peak Before Putting Vented Ridge In Place Ridge Vent Roof Installation Roof

Pin By Gerardo Barrabino On Detalles Constructivos Metal Roof Vents Metal Roof Standing Seam Metal Roof
Install A Flat Roof Vent In 5 Steps Doityourself Com

Double Bubble Install2 Png 95241 399 236 Metal Roof Over Shingles Metal Roof Diy Metal Roof

Pin On Are Test Prep

Pin On Ideas For The House

Brick Slips Installation Soil Pipe Flashing Flat Roof

Perma Boot 312 2 Grey New Oem Plumbing Vent Boot For New Construction 2 Inch Fits 2 Inch Pvc Pipes Gray Click Image To Review More Details Plumbing Vent

How To Shingle Around A Vent Pipe Flashing Youtube

Self Adhering Mod Bit Pipe Flashing Installation Youtube
Pin On Exterior Projects

Pin On Chimney Pipe Stove Pipe

Pin On Products

Pin On I Want

Wood Stove Dektite Silicone Gasket Small Wood Burning Stove Wood Stove Diy Wood Stove

Pin On Roof

Pin On Gutter Services Of Nj

