How To Lay Feather Edge Boards On A Roof

Feather Edge Board Roofing Shed Diynot Forums
Featheredge Boarding

Fitting Feather Edge Board Roof Sides Diynot Forums

Day 14 Of My Garage Rebuild Youtube

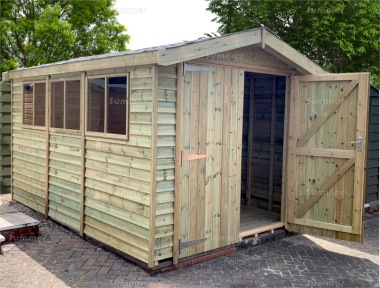
Shed Build A Posh Shed In The Making Shedblog Shedoftheyear
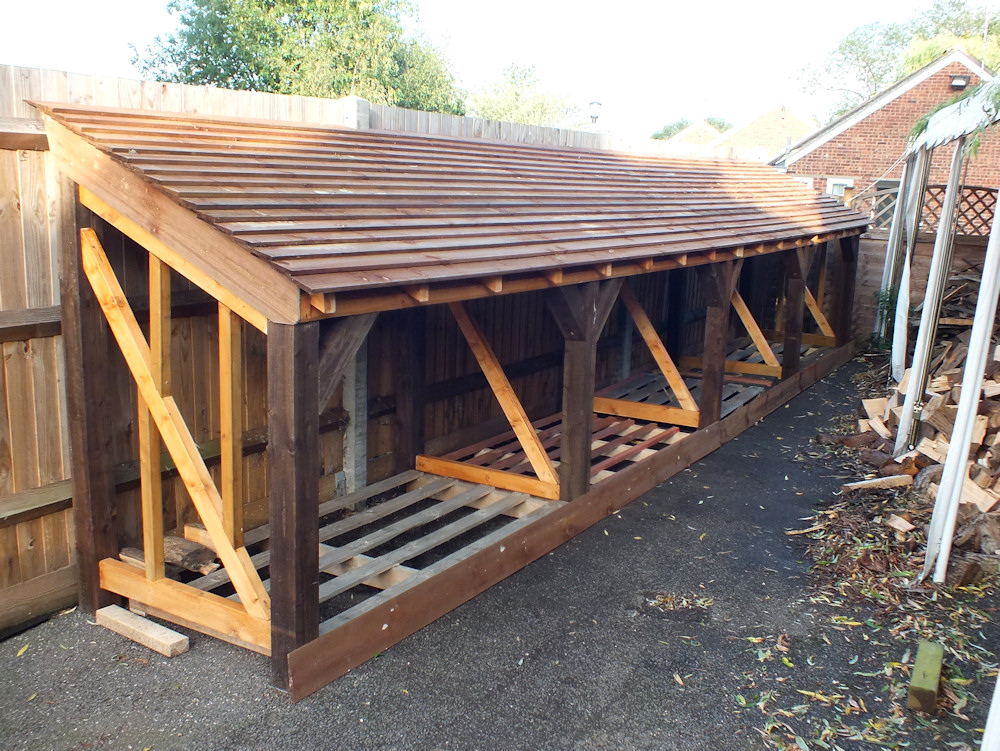
Wood Store The Salutation Restoration

The tongue on the one edge of the board slides into the groove on the edge of the adjoining board locking together to create a strong durable surface.
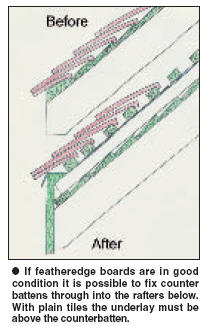
How to lay feather edge boards on a roof. Clad the roof panel with feather edge boards image credit. The thin edge of the board 5 10mm would locate into a rebate in the thick edge of the board below making setting out of the gauge very simple. Drive 1 2 more nails into the fascia board at each of the rafters. Screw through the thickest part of the board with 4 x 40mm wood screws.
The posts should ideally be 4 x 4 inch treated timber set into the ground in a hole 2 ft 600mm deep and concreted with a concrete mix as shown in our concreting fence posts project the picture at teh top of the page shows both the inside of the fence left and the outside right to demonstrate how the. Nail the featheredge boards in place first nail in place the 1st two boards at either end both facing inwards narrow edge facing inwards. How to install lap siding. Position the first piece of plywood or oriented strand board sheathing on the bottom edge of the rafter tails at one end of the roof.
Now nail the rest of the boards use the above nail position diagram above for a reference of where to place your nails the overlap of boards should be approximately 25mm 1 inch. Wickes starting at one end of the roof frame lay the first length of 11 x 150mm x 1 8m feather edge fence board with a 20mm overhang. Place the first nail in each rafter so they re 1 2 inches 2 5 5 1 cm from the top edge of the boards. Tongue and groove cladding.
Place the second nail in the rafter so it s 3 4 inches 7 6 10 2 cm lower than the first one so it s held securely. How to erect close board fencing. Tongue and groove cladding amounts to boards that interlock. Align the long edge of the sheathing with the ends of the.

Bespoke Shed Made With Cls Framing Feather Edge Boards And Felt Roof Building A Shed Garden Storage Shed Outside Storage Shed
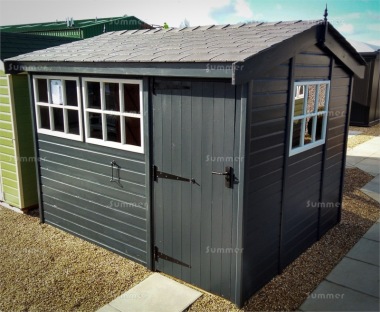
Malvern Holt Shed Feather Board
The Green Living Forum View Topic New Feather Edge Roof On Wood Store Leaking Please Help
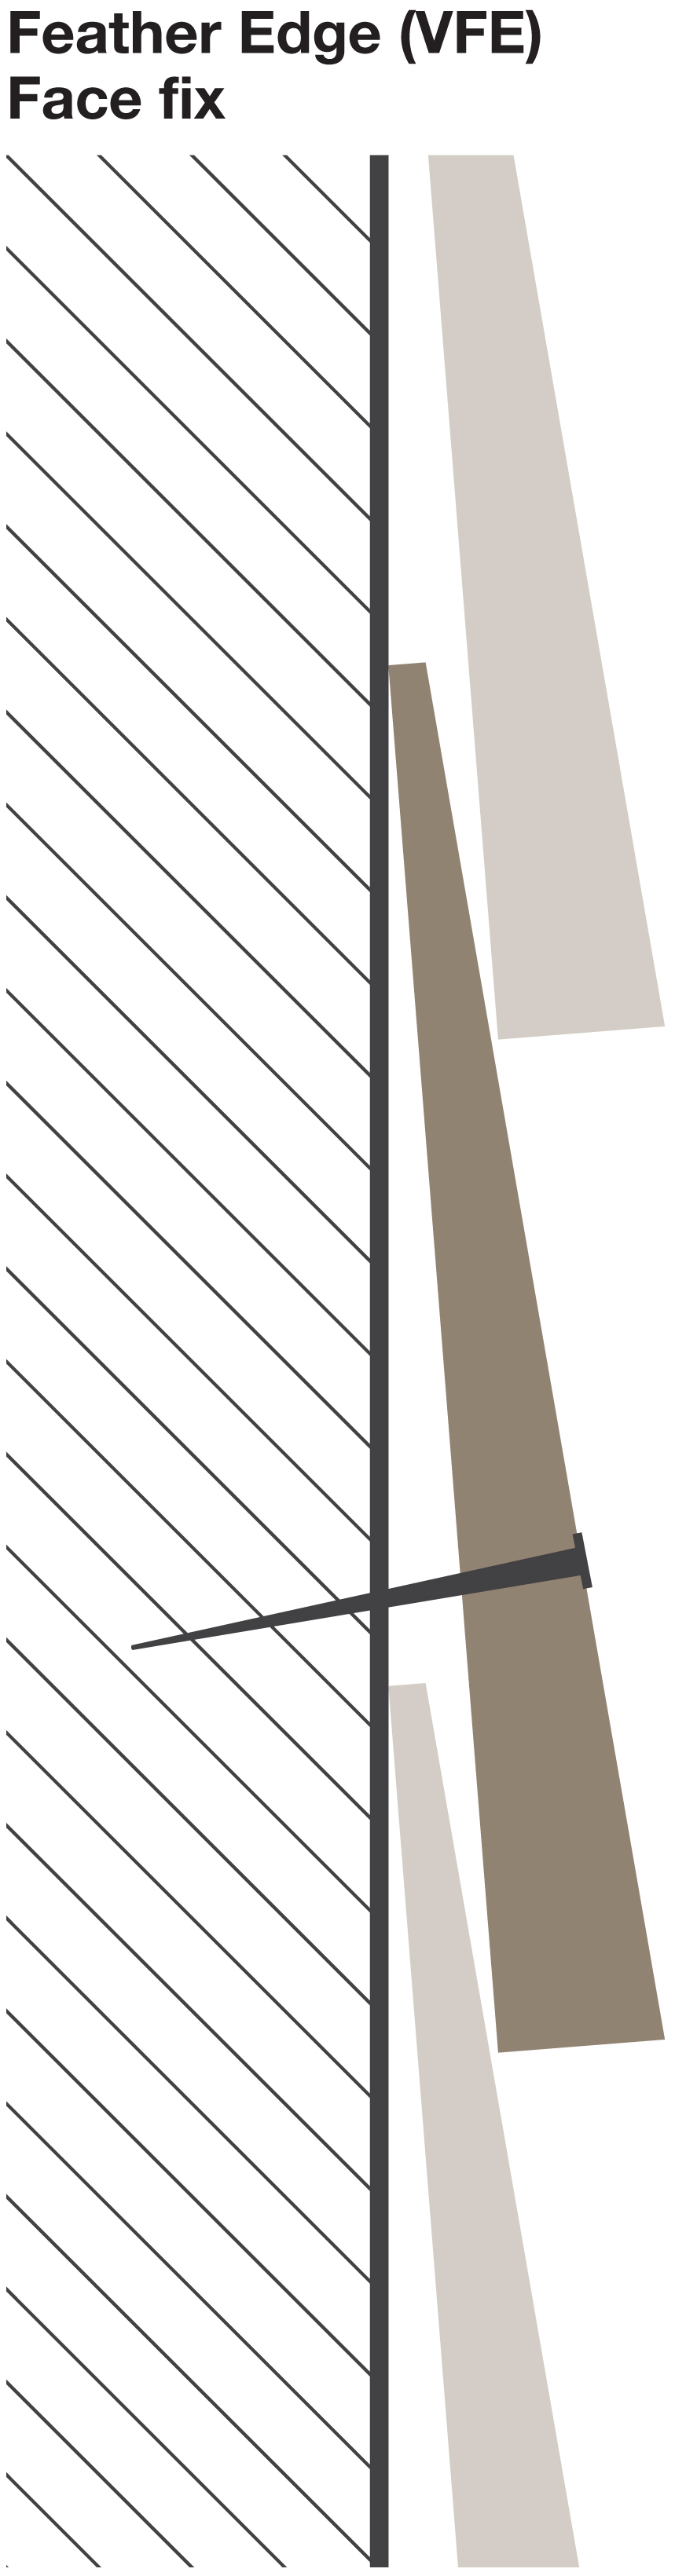
Feather Edge Vastern

Diy Man Cave She Shed Part 15 Fixing Feather Edge Cladding Youtube
Spare Wood And Spare Space I Think I Will Build A Coop Backyard Chickens Learn How To Raise Chickens

Cladding Www Surrey Oak Com
Malvern Stanford Shed Feather Board

Image Result For Feather Edge Cladding Corner Detail Cedar Cladding House Cladding Cladding
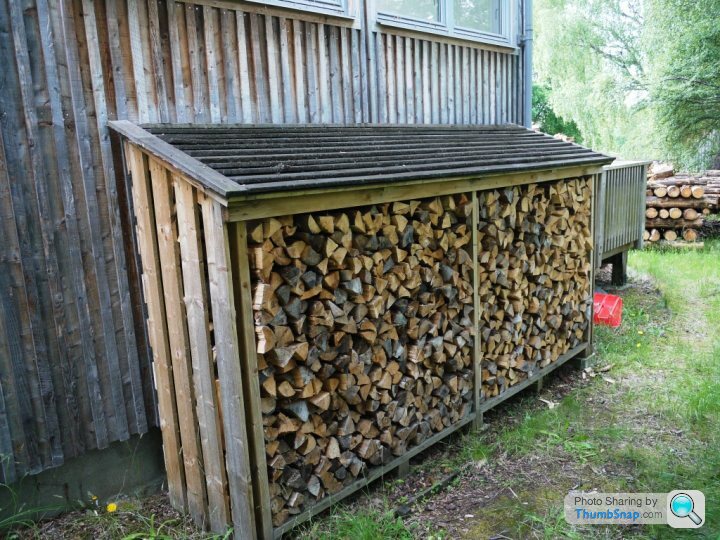
Diy Log Stores And Other Log Type Stuff Page 1 Homes Gardens And Diy Pistonheads

How To Nail Feather Edge Boards Pallet Table Home Decor Decor

Left Over Feather Edge Posts And Pallets Makes An 8 X 4 X 2 Logstore 1 Very Happy Customer Wood Shed Log Store Woodworking

Feather Board Log Stores Herefordshire Log Stores Backyard Sheds Firewood Shed Shed Design

Shiplap Shed Cladding Cedar Cladding House Cladding

6 X 4 Cedar Feather Edge Potting Shed With Cedar Shingle Roof Cedar Shingle Roof Shed Garden Shed

Summerhouse Made With A Cedar Shingle Roof Cedar Featheredge Board Cladding And Joinery Grade French Doors And W Cedar Shingle Roof French Doors Summer House

Top Tips For Installing A Panel Fence Timber Focus

Featheredge Boarded Work Shed Shed Design Shed Oak Framed Buildings

Feather Edge Hausverkleidung

Q Clad Pre Painted Black Feather Edge Timber Cladding Timber Cladding Wooden Cladding Shed Cladding

Home North Wales Sheds

Surf Board Storage Shed With Slate Roof The Wooden Workshop Oakford Devon

Featheredge Shed Made In England Devon And Cornwall Delivery
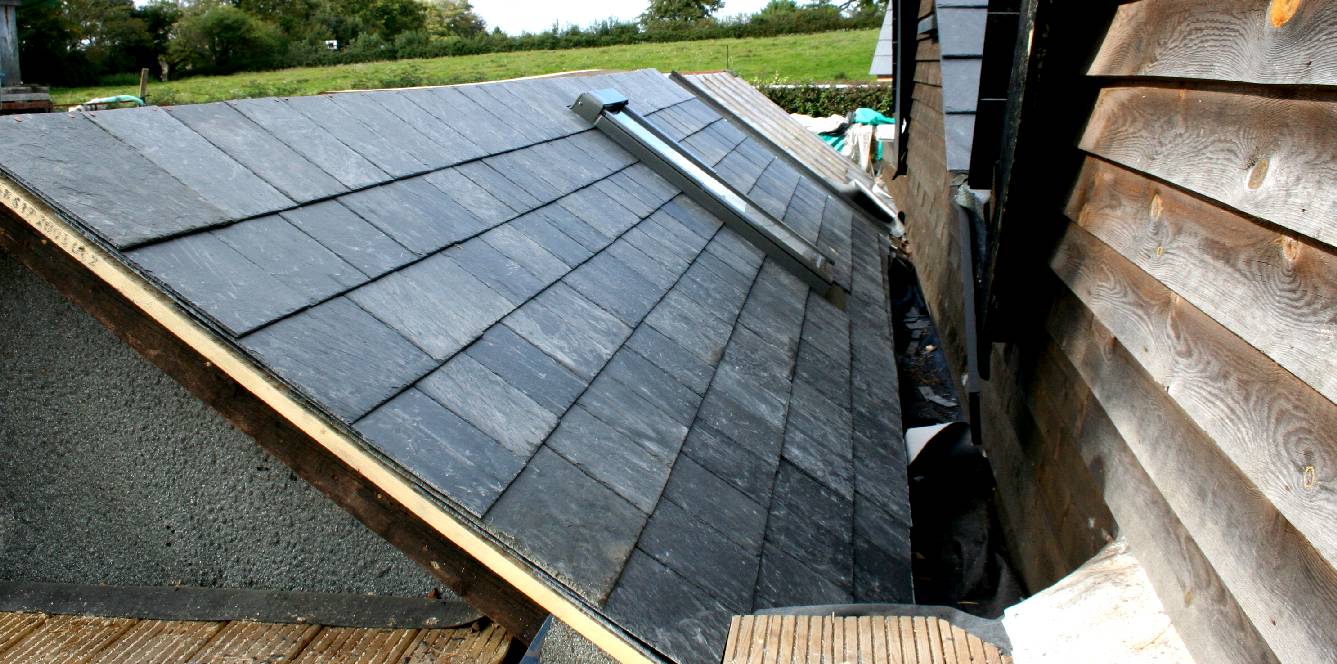
Slate Roofing Tiles Skylights Roofs

Feather Edge Garden Shed Walford Timber Ltd

Exterior Timber Cladding Hartwells Fencing
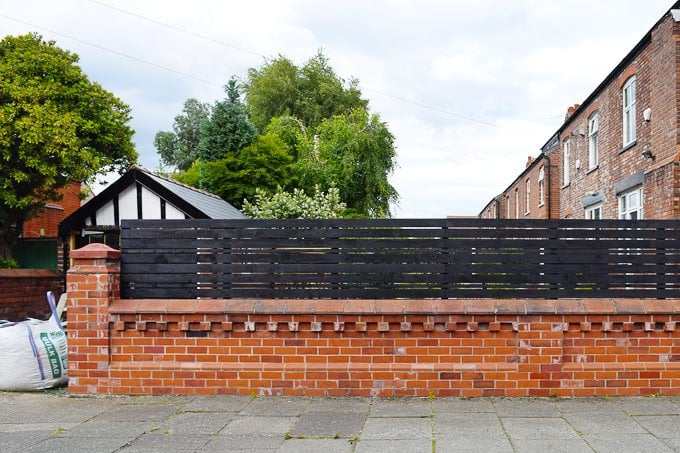
Diy Guide How To Build A Slatted Fence

Wickes Feather Edge Fence Board 100mm X 2 4m Wickes Co Uk

Wooden Feather Edge Fencing Replacement Barnstaple North Devon

Photo Img 1836 Jpg Wood Roof Cedar Shingle Roof Cedar Roof

Black Featheredge Cladding Barn Sheds Cart Shed Feather Edge Weatherboard Timber Cladding Shed Cladding Cladding

Driveway Pedestrian Gates Framed Ledged And Braced Frame Inset With Feather Edge To Match Close Board Fencing Outdoor Fencing Driveway Gate Backyard Projects

Grange Professional Feather Edge Wooden Fence Panels 6ft Internet Gardener Wooden Fence Panels Wooden Fence Fence Design

Timber Cladding Wood Cladding Exterior Timber Cladding Cladding

Feather Edged Fence Panels And Concrete Recessed Gravel Boards In Concrete Posts Including Sloping Panel Fence Panels Concrete Posts Concrete Fence Posts

Roof Shingles For Sheds Home Roof Ideas Shed Homes Roof Design Shed

Q Clad Pre Painted Black Feather Edge Timber Cladding Hoppings Softwood Products Esi Building Design Timber Cladding Cladding Building Cladding

Waney Edge Cladding On The Outside Wood Cladding Exterior Wooden Cladding Exterior Cladding

Feather Edge Boards Howarth Timber

Closeboard Fencing With Capping Closeboard Tate Fencing Fence Outdoor Structures Outdoor

Closeboard Fence Panel Feather Edge Fence Panel Supplied Supplier Installed Installer In Kent Sittingbourne Milton Rainham Sheerness Minster Isle Of Sheppey Chatham Newington Maidstone Canterbury Whi

Hoppings Softwood Products Q Clad Pre Painted Black Feather Edge Timber Cladding 3 Of 10 Brick Exterior House House Exterior Timber Cladding

How To Build A Shed Base On A Slope Building A Shed Base Shed Base Building A Shed

