How To Nail Attic Stair Trim
How To Install Attic Stairs Trim Step By Step Plans Video Copewood

Trim Frame Before Or After Putting Up Attic Ladder Finish Carpentry Contractor Talk

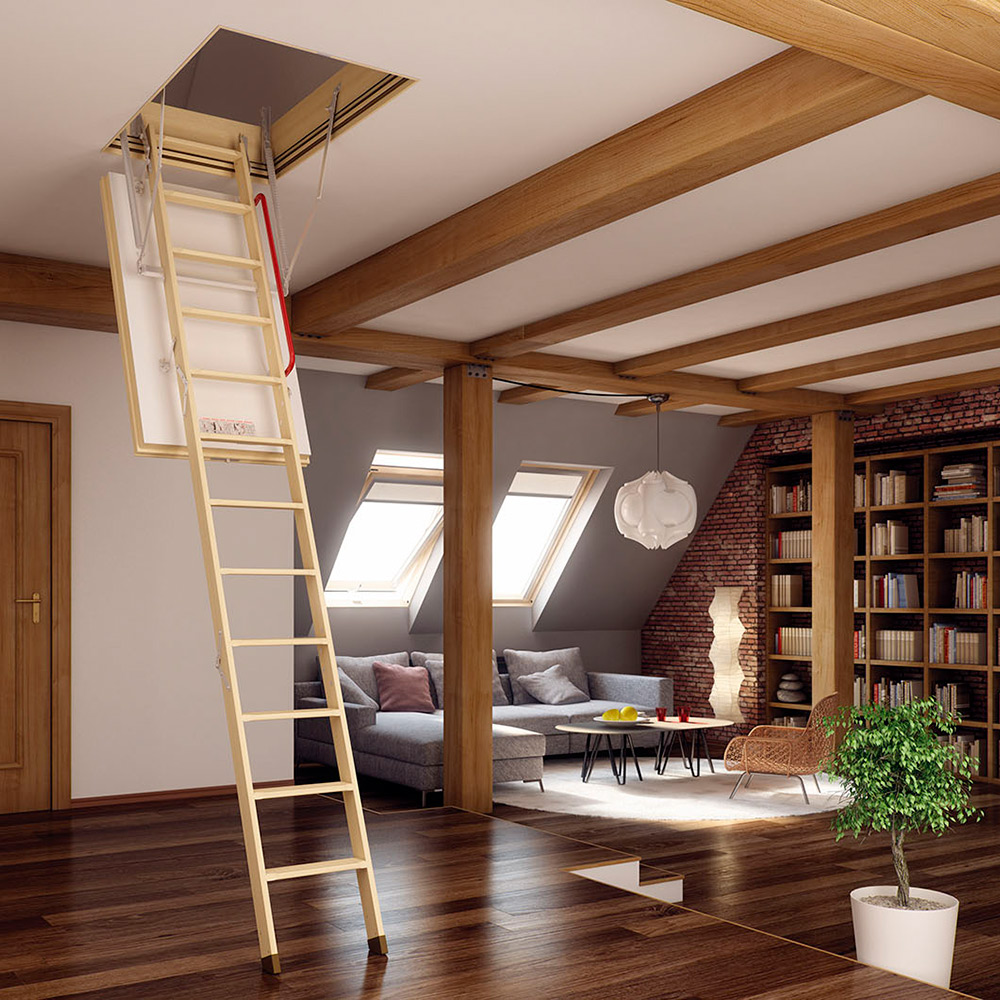
How To Install Pull Down Attic Stairs

Pull Down Attic Stairs Hook Google Search Attic Stairs Pull Down Attic Stairs Attic Remodel

How To Install An Attic Ladder Youtube

My Attic Door For Pull Down Stairs Attic Doors Attic Renovation Attic Access Door
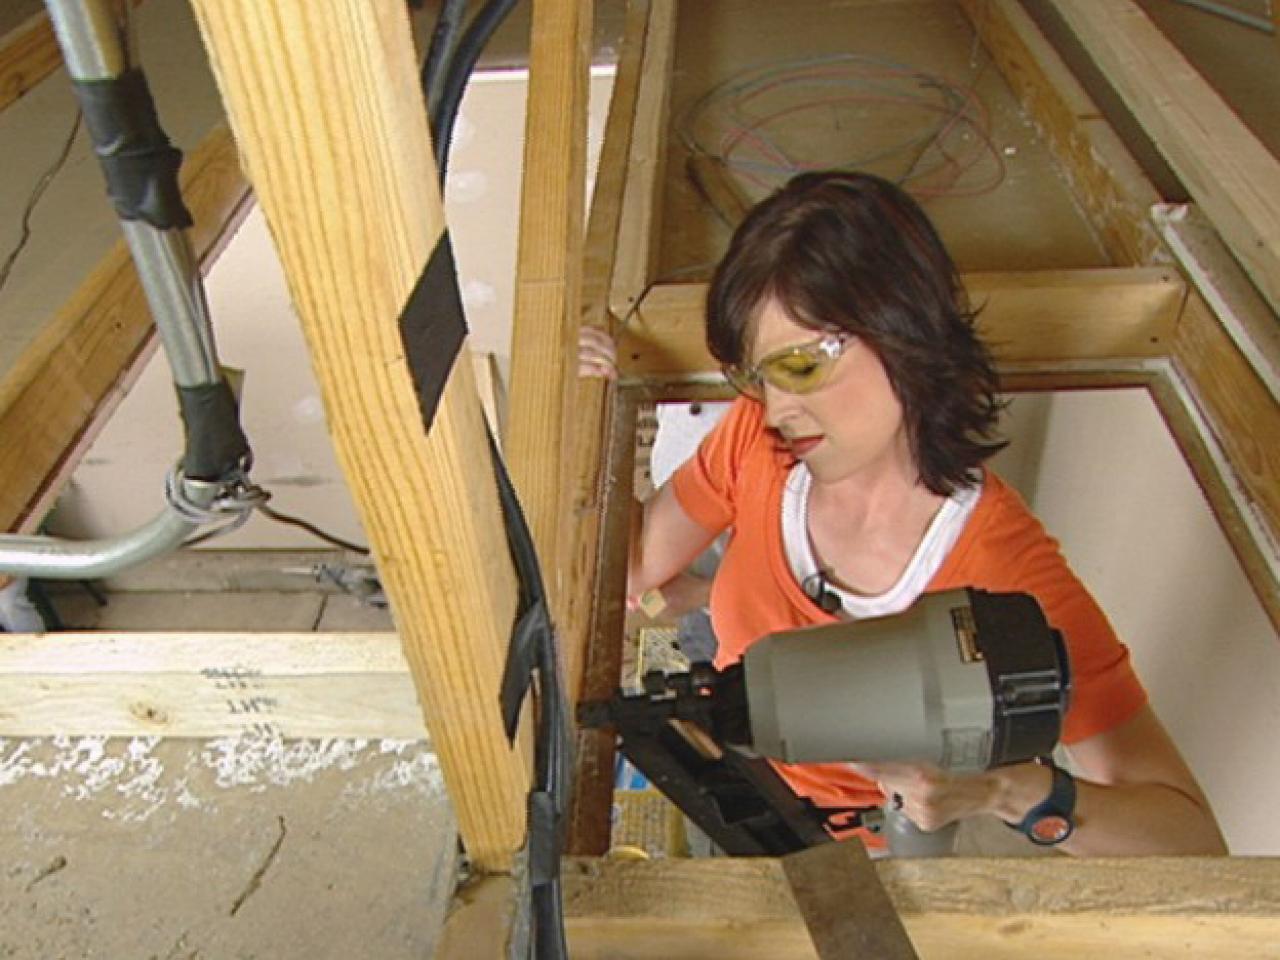
Repeat this step with a second piece of lumber on the opposite side.
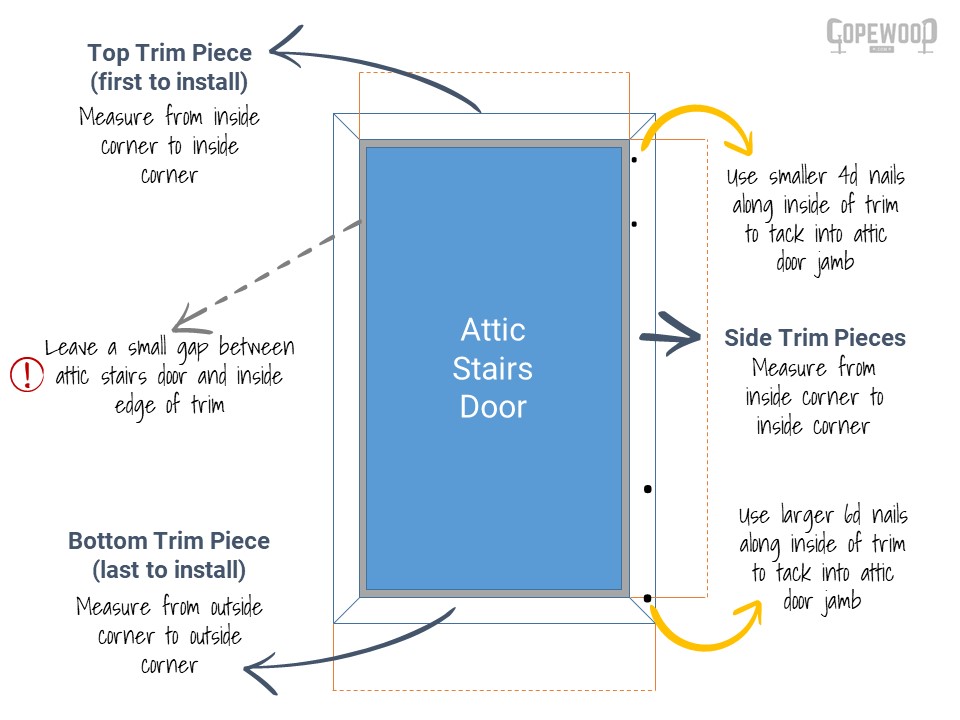
How to nail attic stair trim. Second the trim acts as a ledge for the drywall ceiling piece to rest upon when you don t need access into the attic. Mark and cut 45 degree angles at each end of a piece of molding. The purpose of the trim is two fold. How to install molding around an attic stair s entrance.
Proceed with the stair installation according to the product directions once the opening is trimmed. Place a nail set tool on top of each nail head and tap it firmly to sink the heads. Transfer the measurements from your template wood. Make the cuts with a miter.
Measure and cut top side cut a 45 degree angle on a piece that will be used for the top of the attic stairs. Apply wood putty on top of each depression and wait until it dries. You can replace or add an attic stair system to make your attic more functional and it s a project you can do in a weekend. Measure cut and.
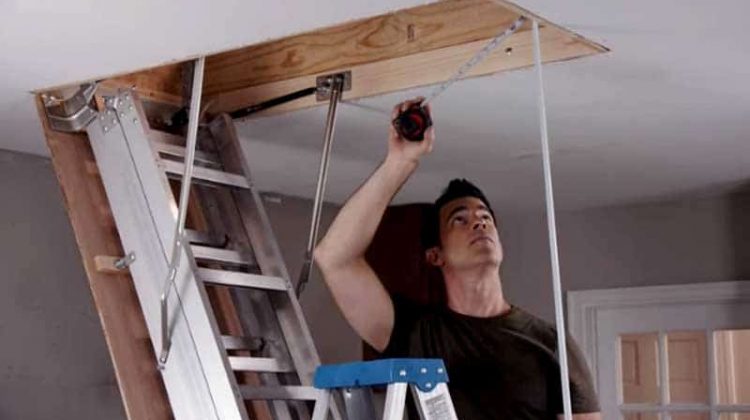
Secure by drilling a minimum of two nails through the lumber and into the joist. How to install attic stairs trim step 1. Fit the miter cut at the. Work from a stepladder and measure across one of the short sides of the stair frame from corner to corner.
First the trim provides an attractive finish to the cut. Nail trim to door jamb cut the second 45 degree angle on the first piece of trim and hold it in place along with. Open the third section of attic stairs and lay them on the sawhorses or worktable. Sand the wood putty smooth using 200 grit.
Apply glue on the flat surface that attaches at the tread and a small amount on the miter that fits at the miter on the lower end of the installed piece at the riser. Add decorative trim to finish it off. Use trim molding that is wide enough not only to cover the rough cut but also to extend far enough into the opening to that the.

Installing An Attic Ladder

Striped Wall And Tip For Attic Doors Attic Doors Attic Renovation Attic Flooring

House Tour Guest Bedroom Attic Doors Attic Renovation Attic Stairs
/cdn.vox-cdn.com/uploads/chorus_image/image/65891558/attic_access_x.0.jpg)
How To Install Pull Down Attic Stairs This Old House

Hiding The Cord In A Pull Down Attic Stair Access Attic Renovation Attic Remodel Attic Storage

How To Replace Attic Cord With Hook And Pull Attic Renovation Attic Rooms Attic Design

Trim Frame Before Or After Putting Up Attic Ladder Page 2 Finish Carpentry Contractor Talk

Installing The Pull Down Attic Ladder Project Small House

How To Install Attic Ladder Easy To Follow

How To Install Trim Around Attic Stairs Copewood Youtube
How To Install An Attic Ladder How Tos Diy
Installing Trim Around An Attic Ladder

Umberto Fusco Uploaded This Image To 39 Garage Fix 39 See The Album On Photobucket Attic Renovation Attic Flooring Attic Access Door

Installing Stairway Molding In Your House Stairs Trim Staircase Molding Stairs Design

Installing The Pull Down Attic Ladder With Images Attic Remodel Attic Storage Attic Flooring

How To Install An Attic Ladder Secrets Tricks That You Should Know

Boys Bedroom Ideas To Help You Create A Fun Room For Your Little Guy Boys Bedrooms Attic Doors Attic Flooring
Attic Ladder Installation The Home Depot
Https Encrypted Tbn0 Gstatic Com Images Q Tbn 3aand9gcskdnbnlc4lczeovkybwlu9ginprnty1bin2pnuq X7janltcbc Usqp Cau

Installing The Pull Down Attic Ladder With Images Attic Renovation Attic Remodel Attic Design

How To Install Beadboard Paneling Pine And Prospect Home Diy Stairs Stairs Trim Stair Moulding

Nail Head Stair Runner Trim Stairs Stair Runner Residential Flooring

How To Insulate And Air Seal Pull Down Attic Stairs Greenbuildingadvisor
/cdn.vox-cdn.com/uploads/chorus_asset/file/19616504/tom_attic_stairs.jpg)
How To Replace A Pull Down Attic Staircase This Old House

Faux Stair Skirt Board Stairs Skirting Stair Skirt Board Stairs

I Visited The Kips Bay Showhouse This Weekend With The Lovely Caitlin We Had A Great Time Examining All The Finishes And Details The De Upholstery Stairs Home

Hide Attic Door Google Search Attic Design Attic Flooring Attic Access Door

Instagram Photo By Amy Vermillion Interiors Apr 13 2016 At 1 01pm Utc Stair Runner Carpet Stairs Stair Runner Carpet

Top 10 Best Attic Ladders Most Updated Reviews In 2020

14 Pro Approved Tips For Tight Miters In 2020 Mitered

Original Stealth Fiberglass Access Doors Attic Access Door Attic Renovation Basement Ceiling

Image Result For Baseboard Stairs Trim Transition Stairs Trim Stairways Baseboards
How To Install An Attic Ladder By Yourself Details But Simple Guidelines

The Best Attic Ladders For Easy Loft Access In 2020 Attic Ladder Attic Stairs Stairs

2 Winder Stair Turn Winder Stairs Interior Stairs Stairs Design

How To Build A Newel Post Beneath My Heart Attic Renovation Newel Posts Newel Post Caps

Diy Nailhead Stair Runner Diy Stairs Ikea Rug Stair Runner

Quite A Clever Idea Craftsman Cottage Attic Renovation Basement Doors

Entryway Molding How I Added Wall Trim Myself Wall Trim Wall Trim Molding Picture Frame Molding

I D Like The Risers To Be The Same Material As The Tread Installing Laminate Flooring Laminate Stairs Stair Nosing

Staircase Millwork Molding I Want To Paint Front Of Steps This Makes Me Think Twice About It Bed Stairway Design Staircase Design Modern Staircase

10 Interested Tips And Tricks Finished Attic Loft Attic Window Treatments Attic Layout Bedrooms A In 2020 Traditional Staircase Staircase Remodel Open Basement Stairs

